With ConfigServer Security & Firewall (CSF) installed we can use it to monitor the IP addresses associated with our server, to ensure they have not been blacklisted. You will find your IP addresses blacklisted for various reasons but the most common reasons are due to the volume of emails coming from your server, or that your message seem to have characteristics associated with Spam messages.
Once your IP becomes blacklisted is it added to a public blacklist. These public blacklists are commonly referred to as DNS-Based Realtime Blacklists (DNSRBL) or Realtime Blackhole List (RBL). They are maintained and updated by various organisations such as Barracuda, Spamhaus and Spamcop. If your server IP address ends up in one of these blacklists you will almost certainly have email delivery issues.
Email providers such as Google, Yahoo and Microsoft maintain their own blacklists and do not make these public. As such using any IP blacklist tool will not be able to check these email service providers and generally the first you will notice is a bounced email. Thats why maintaining your IP address in good standing is imperative to ensuring your email is successfully delivered.
In this guide we will show you how to schedule automatic IP blacklist scans, run IP blacklist scan manually and to configure the RBL settings in CSF to enable, disable the inbuilt RBLs, enable and disable local IP addresses. With CSF being the same software between different control panels, this guide is applicable to DirectAdmin, cPanel and CyberPanel.
How to Schedule Automatic IP Blacklist Scans
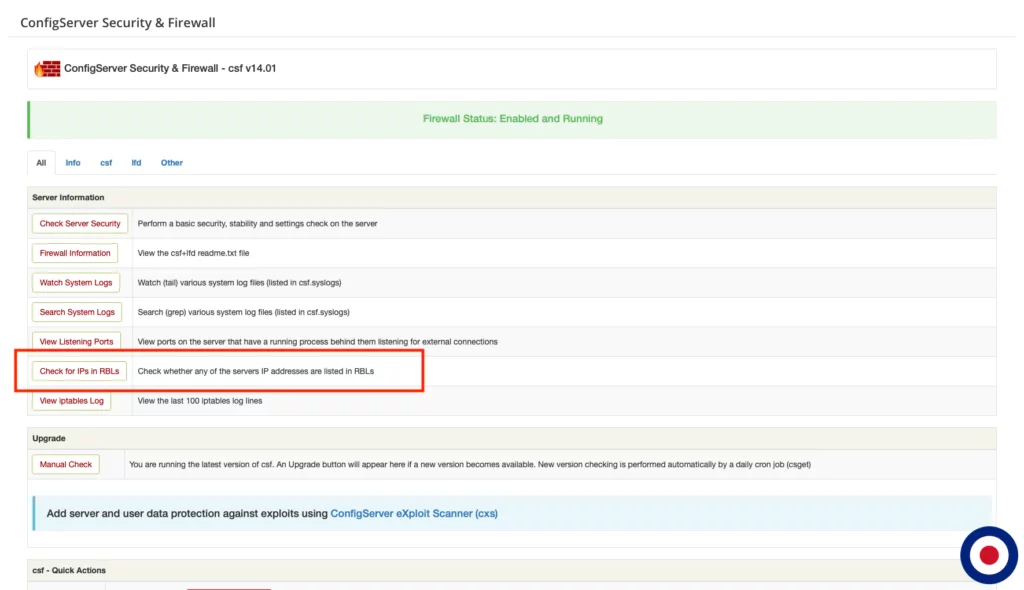
To schedule automatic IP blacklist scans you will need to log into your control panel dashboard. Select ConfigServer Security & Firewall and then select the Check for IPs in RBLs button.
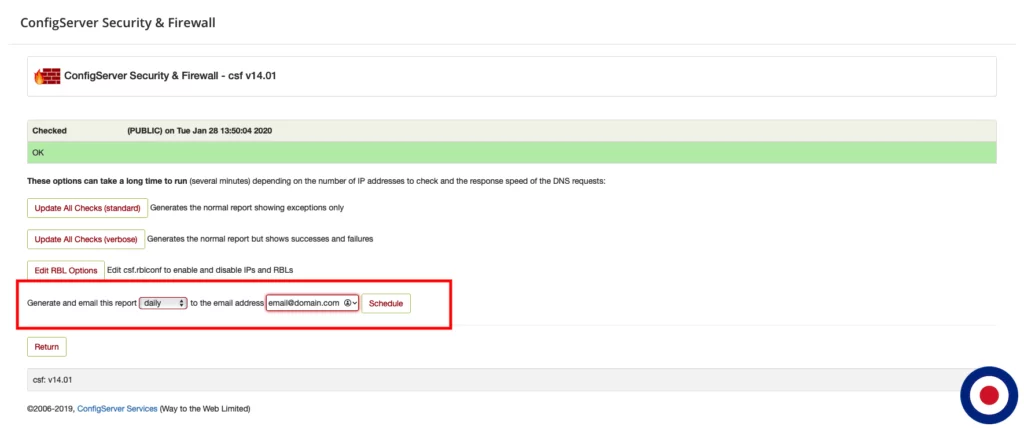
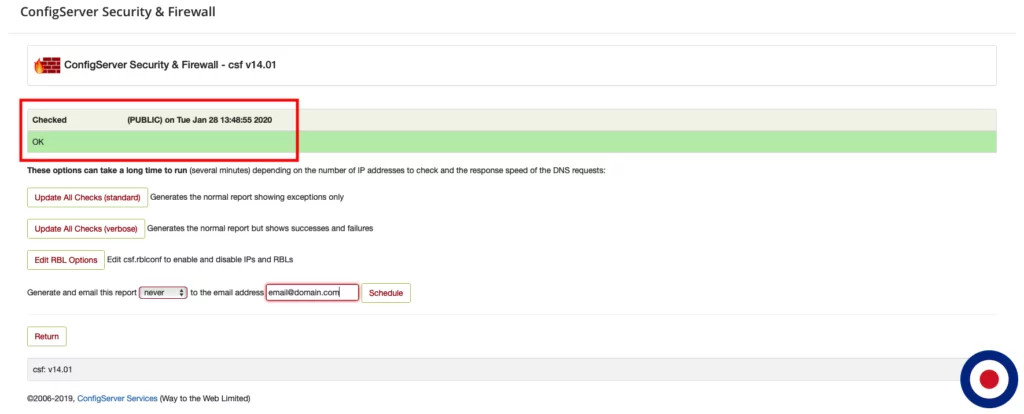
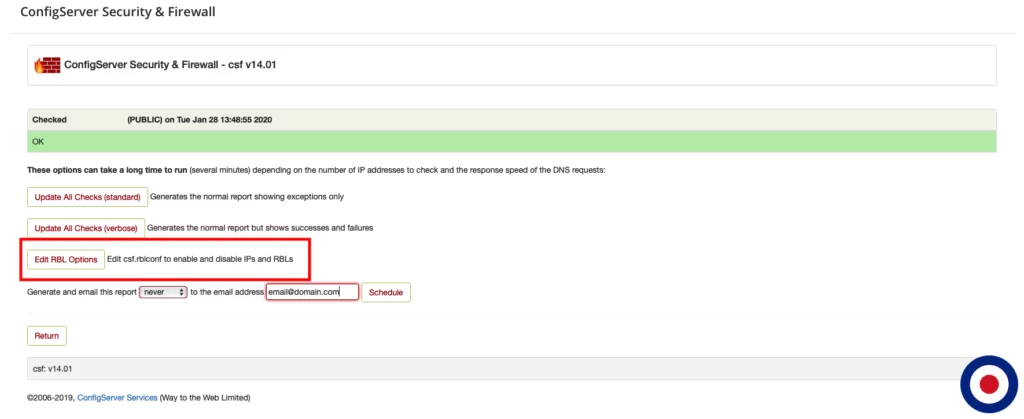
At the bottom of the Check for IPs in RBLs panel, you will need to select your preferred option of when the email should be generated and sent. The options never, hourly, daily, weekly or monthly. We would recommend you check the status of your IP addresses daily. The add the preferred email address to receive these notifications. Once you have entered the details press the Schedule button and you will be shown a confirmation message saying Report scheduled to be emailed to email@domain.com daily.
That’s it. You have successfully setup automatic IP blacklist scans to be sent to your email address each day.
How to Manually Run IP Blacklist Scans
To run manual IP blacklist scans you will need to log into your control panel dashboard. Select ConfigServer Security & Firewall and then select the Check for IPs in RBLs button.
When we run an IP blacklist scan manually, we have two options Update All Checks (standard) and Update All Checks (verbose).
The Update All Checks (standard) button will generate a normal report that will only show exceptions such as timeout errors.
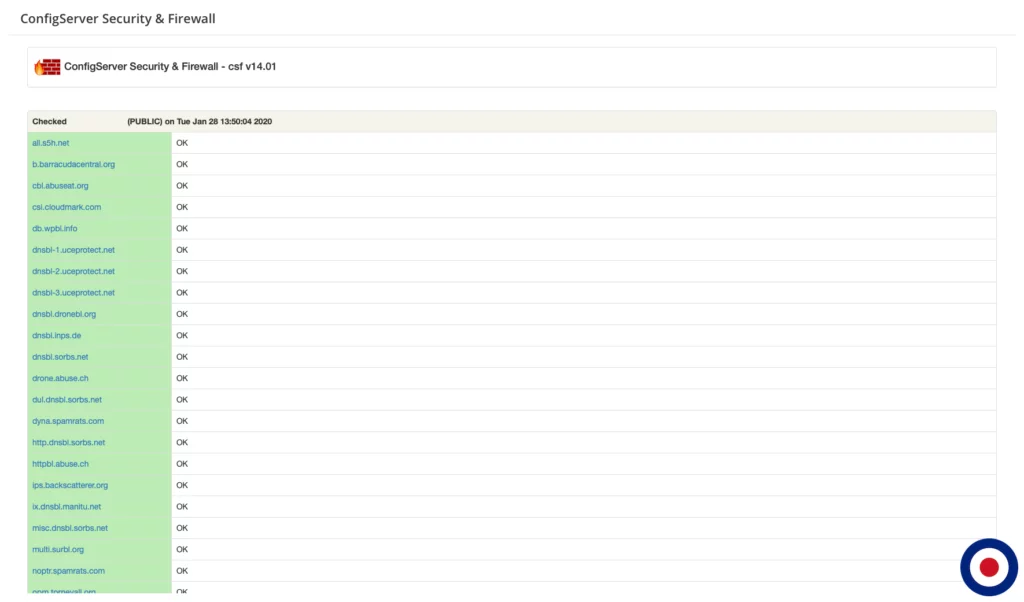
The Update All Checks (verbose) button will generate a normal report that will show all success checks and failures where the IP address is listed.
If your IP address is found to be listed on a blacklist, CSF will provide links to enable you to request removal from the list.
That’s it. You have successfully completed a manual IP blacklist scan.
How to Enable or Disable IPs and RBLs
To run edit the RBL options in CSF you will need to log into your control panel dashboard. Select ConfigServer Security & Firewall and then select the Check for IPs in RBLs button.
Now we will need to select the Edit RBL Options button.
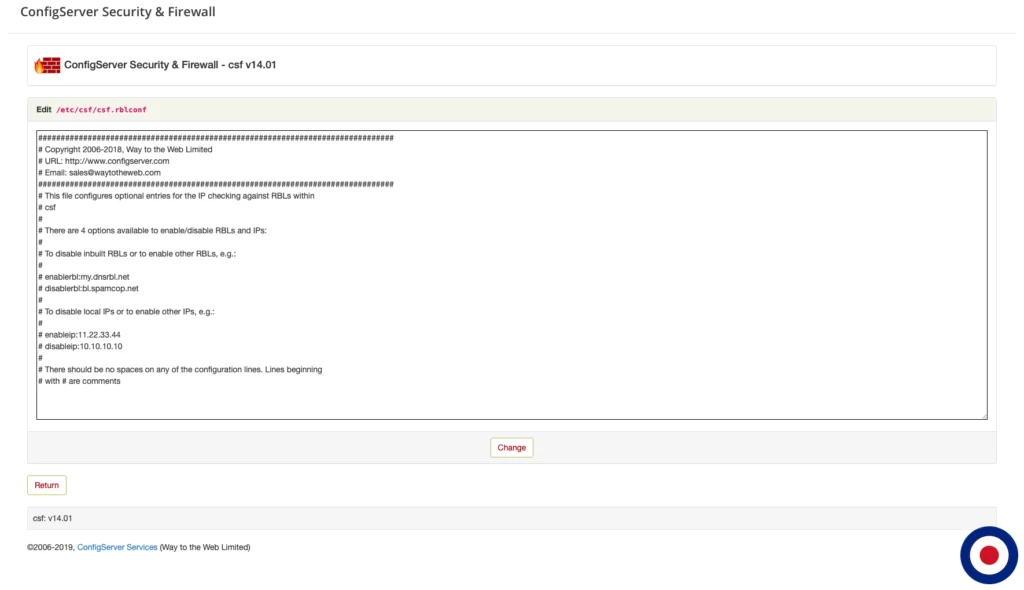
CSF will open the RBL options page. Here we will be able to directly edit the csf.rblconf file. Using this file you can enable or disable RBL lists and IP addresses from being checked.
Once you have completed your updates to the file, just click the Change button which will reload the csf.rblconf file in CSF and restart LFD.
That’s it. You have successfully edited the RBL options in CSF.

