One of the pieces of essential security software installed on many servers is ModSecurity, which is sometimes referred to as Modsec and enables a web application firewall for a server. ModSecurity provides admins with a toolkit to enable real-time web application monitoring, full traffic logging with full access control over rules to protect your server potentially blocking common code injection attacks which further strengthens the security of the server.. A web application firewall will establish an external security layer to your server that increases the protection level, detects, and prevents attacks before they even reach web-based software programs such as WordPress.
ModSecurity supports a flexible rule engine to perform both simple and complex operations. It comes with a Core Rule Set (CRS) which has various rules for cross website scripting, bad user agents, SQL injection, trojans, session hijacking, and other exploits. With DirectAdmin you can install free ModSecurity Rules provided by either OWASP or Comodo ModSecurity Rules using custombuild GUI or command line or you can utilise Commercial ModSecurity Rules provided by Malware.Expert or Imunify360, however installation of these is outside of the scope of the guide.
You can enable either OWASP or Comodo ModSecurity Rules using the following commands.
cd /usr/local/directadmin/custombuild
./build set modsecurity yes
# TO ENABLE OWASP RULES
./build set modsecurity_ruleset owasp
# TO ENABLE COMODO RULES
./build set modsecurity_ruleset comodo
./build modsecurity
Then rebuild your Apache, Nginx or OpenLiteSpeed webserver using the following commands.
./build apache
./build rewrite_confs
./build nginx
./build rewrite_confs
./build openlitespeed
./build rewrite_confs
With the release of DirectAdmin version 1.61.4, a new ModSecurity feature has been added that enables users to skip certain ModSecurity Rules or fully disable ModSecurity as and when required.
In this guide, we will show you how to enable or disable ModSecurity your domain, view the ModSecurity log snapshot or detailed report and how to disable individual rule IDs using the DirectAdmin dashboard.
Prerequisites
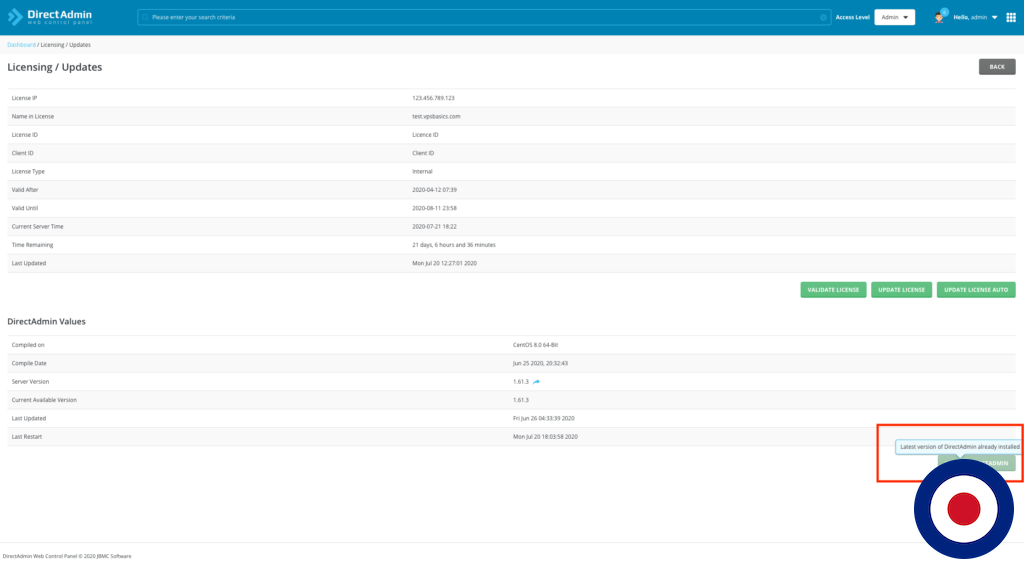
Before we start you will need to ensure you have version 1.61.4 of DirectAdmin installed on your server. You can check this using the admin dashboard. After signing into your server click the Licensing / Updates icon under the Support & Help section.
In the Licensing / Updates dashboard at the bottom right you will see a button with UPDATE DIRECTADMIN. Click this button to automatically update your version of DirectAdmin. If you have the latest version installed the button with be greyed out and display a notice which says Latest Version of DirectAdmin already installed.
ModSecurity Settings & Logs
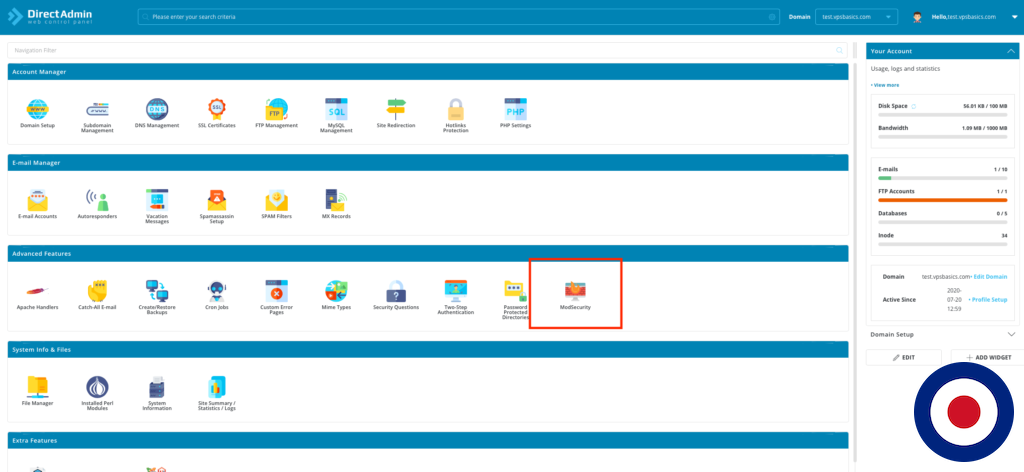
After you have logged into your DirectAdmin dashboard you will see the ModSecurity icon under the Advanced Features section. To open the ModSecurity dashboard simply double click on the icon.
This will open the ModSecurity dashboard which will show the domain name in the top left of the screen and will show the ModSecurity log for that domain below.
In the ModSecurity dashboard log section you can view a snapshot from the modsec_audit.log showing the rule that has been violated. To activate simply hover over the Rule ID section. If this rule has triggered a false-positive you can make a note of the Rule ID which we will use further on to disable that rule.
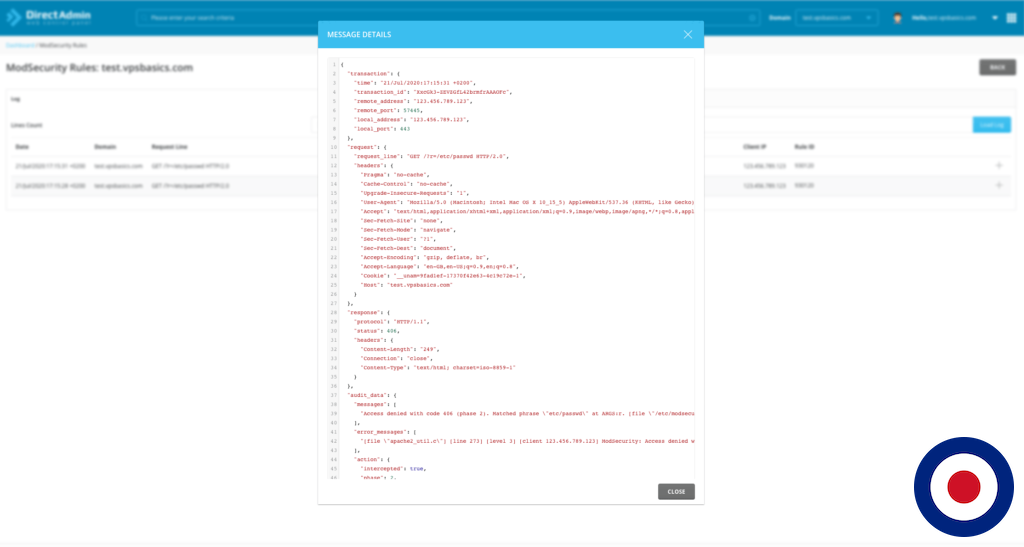
If you want to view more details about the rule violation from the modsec_audit.log, simply click the + symbol to the right of the screen and select View Log Item. This will open the detailed log as shown below.
Enable or Disable ModSecurity Rules
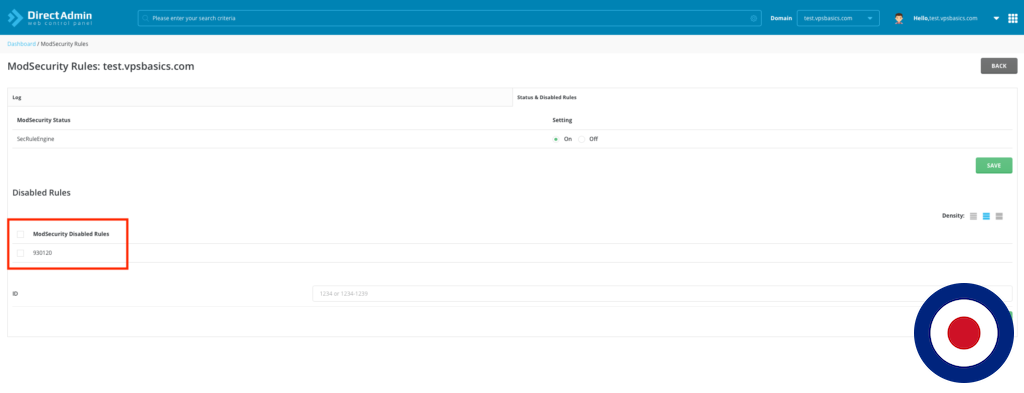
Under the Status & Disabled Rules tab you can enable or disable ModSecurity or disable ModSecurity Rules.
To enable or disable ModSecurity simply click the On or Off radio button next to SecRuleEngine and click the SAVE to the right. After you have saved your option a small confirmation box will appear in the bottom saying ModSecurity Rules Saved.
If you want to disable a certain ModSecurity Rule ID you can do so under the Disabled Rules section. Sometimes ModSecurity can be a little sensitive and you may find that a rule has triggered a false-positive, particularly when using certain Content Management Systems (CMS) such as WordPress. The new feature makes disabling ModSecurity Rules simple. All you need to do is enter the Rule ID in the box and click the DISABLE RULE button.
After you have saved your option a small confirmation box will appear in the bottom saying Skipped rule added and the Rule ID will appear under the ModSecurity Disabled Rules section.
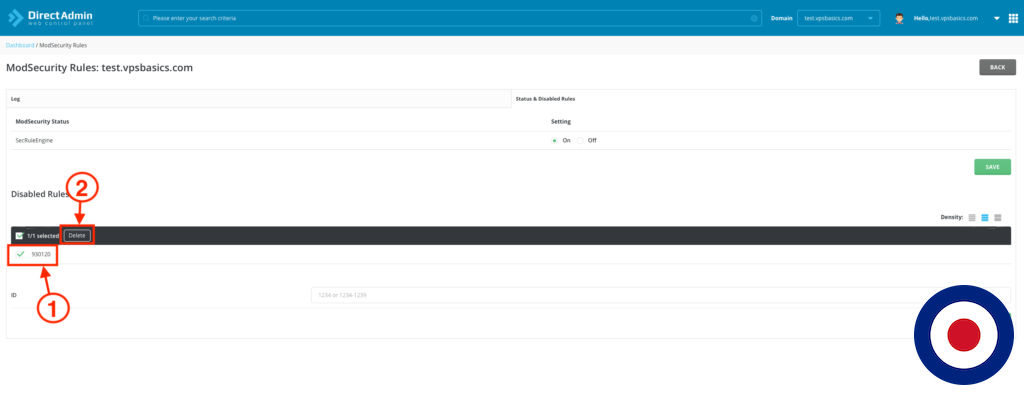
If you want to enable a previously disabled ModSecurity Rule simply click the checkbox next to the Rule ID and then press the Delete button. After you have deleted the rule a small confirmation box will appear in the bottom saying selected skipped rules removed. If you wanted to enable multiple disabled rules simply select the checkbox next to each Rule ID and then press the Delete button.
That’s it. You have now successfully learnt how to enable or disable ModSecurity for your domain, viewed a snapshot and detailed view of the ModSecurity log showing the ModSecurity rule violation and enabled and disabled individual and multiple rule IDs.


