With Contact Form 7 (CF7) installed on our WordPress website, we can now easily manage multiple contact form, customise the structure and layout and provide reply emails to our visitors. If you want to add CF7 to your WordPress website you can visit the plugin page in the WordPress repository.
You may find that when designing a contact form for your website, the need to offer a selectable email address within the form. For example, your visitors may want to send an email to your marketing department or sales department so having a one size fits all approach to contact form email addresses could create an unnecessary delay to your clients as the email would need to be forwarded to the relevant team. To resolve this we can create a contact form which will allow your clients to select the email recipient using a drop-down menu with email addresses for the Sales team, Support department or even the CEO of the company.
In this guide, we will explain how to add a dropdown menu with selectable email addresses on your contact form, how to protect these email addresses from email harvesting and add the correct mail-tag to your contact form.
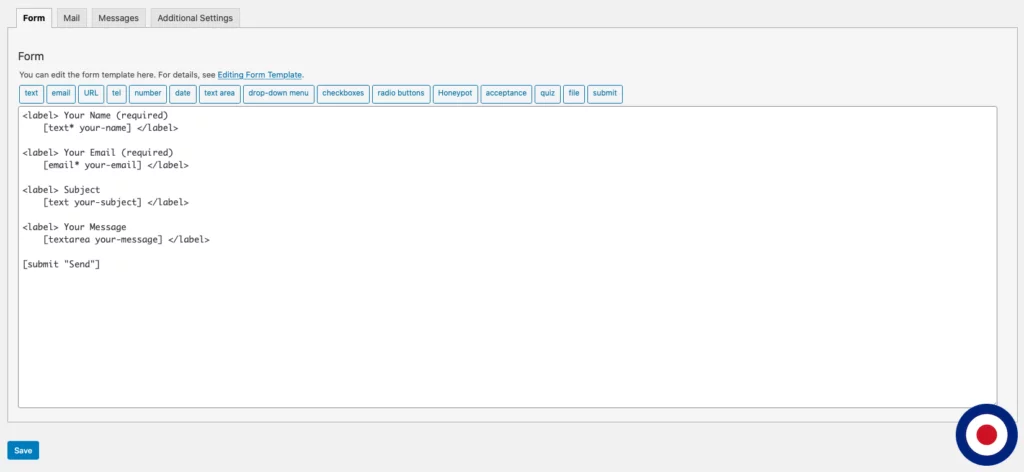
To add a dropdown menu with selectable email addresses to a contact form just add the code below. Select the form you want to edit Contact > Contact Form > Add New and in the Form panel just copy and paste the code.
<label> Select Department
[select* department include_blank "sales@example.com" "support@example.com" "ceo@example.com"]</label>
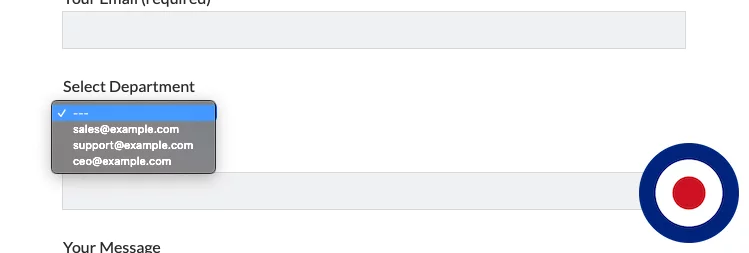
Now your client can select the desired recipient using the dropdown menu from your contact form.
As you can see from the image above the problem with the dropdown menu is that it exposes the email addresses to anyone using the contact form or website scraping email harvesters. Therefore, we will need to ensure that the email addresses are hidden from the contact form and we will display a corresponding name instead.
Note
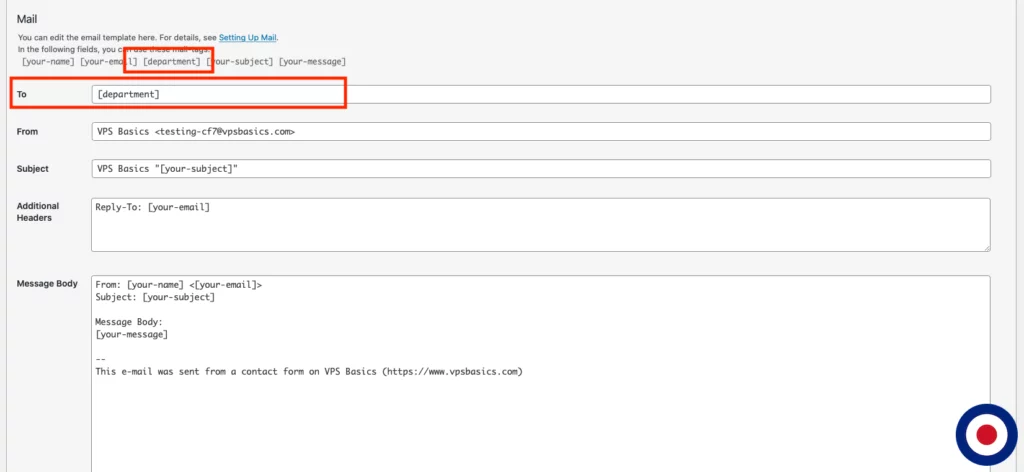
In the Mail tab, you will need to configure the Mail Template to ensure the email is delivered to the correct recipient. In the example above we have used the mail-tag department. Therefore, in the To section of the Mail Template, you can add the mail-tag [department] and CF7 will deliver the email to the correct recipient.
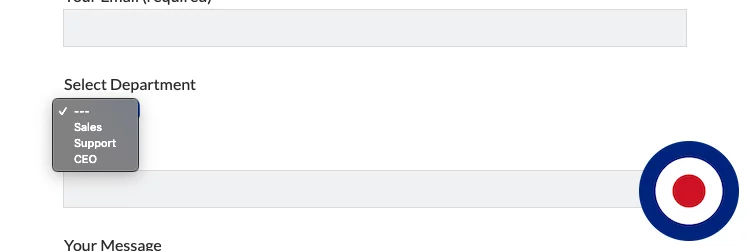
To hide our email addresses we will make use of the built-in pipe (‘|’) support in CF7 to connect our two commands. The pipe character enables the system to execute two commands. The first command, compute the output and then send the output to the next command. When we add the pipe character to CF7 it will only display the first command but while processing the contact form will use the second command for the final output i.e. the recipient email address. For example, add the moment we have sales@example.com showing in our contact form, however, if we change the line in the code above to Sales|sales@example.com our contact form will only display Sales without displaying the email address.
To enable this change all we have to do is change the code we entered previously to the following:
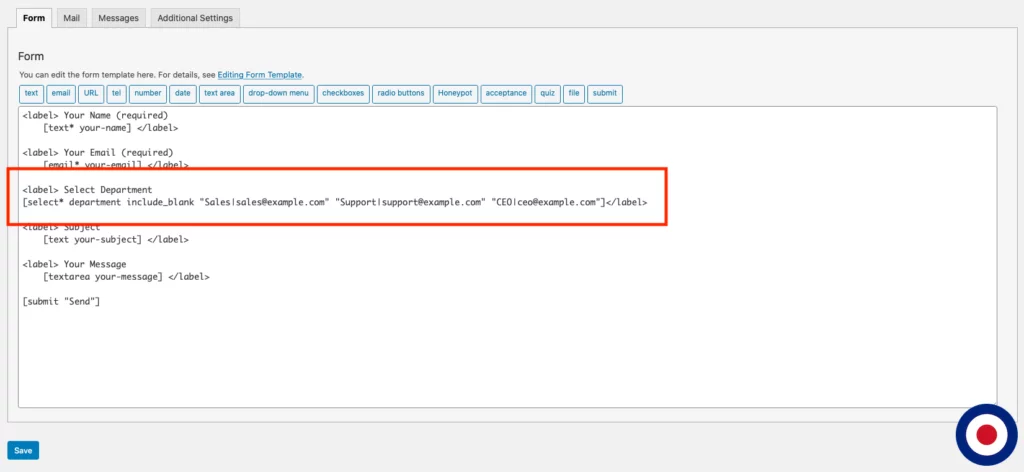
<label> Select Department
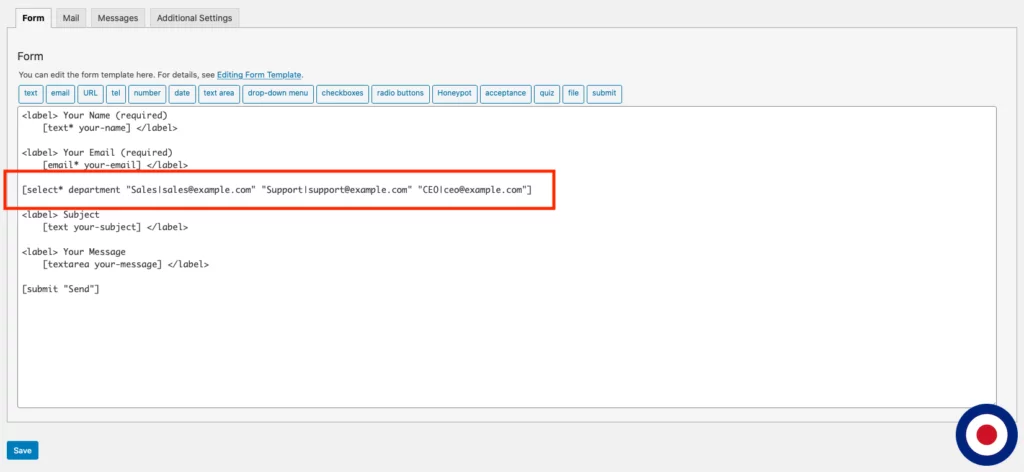
[select* department include_blank "Sales|sales@example.com" "Support|support@example.com" "CEO|ceo@example.com"]</label>
Create a Contact Form with Selectable Email Addresses using the Form Tab
Now we will show you how to add a dropdown menu to CF7 using the Form Tab option. In your WordPress dashboard select the CF7 plugin using Contact > Contact Form > Add New.
Now we need to add a dropdown menu with our selectable email addresses separated by a pipe (|) character. To do this just copy and paste the code below:
<label> Select Department
[select* department include_blank "Sales|sales@example.com" "Support|support@example.com" “CEO|ceo@example.com”]</label>
Click the Save button add the bottom of the Form Tab.
Now move to the Mail Tab and add the [department] mail-tag to the mail recipient section To, then click the Save button.
That’s it. You have now successfully added a dropdown menu with selectable email addresses on your contact form, protect these email addresses from email harvesting using the pipe character and added the correct mail-tag to your contact form.
Create a Contact Form with Selectable Email Addresses using the Tag Generator
Now rather than copying and pasting code into the CF7 Form Tab we will show you how to add a dropdown menu using the CF7 Tag Generator. In your WordPress dashboard select the CF7 plugin using Contact > Contact Form > Add New.
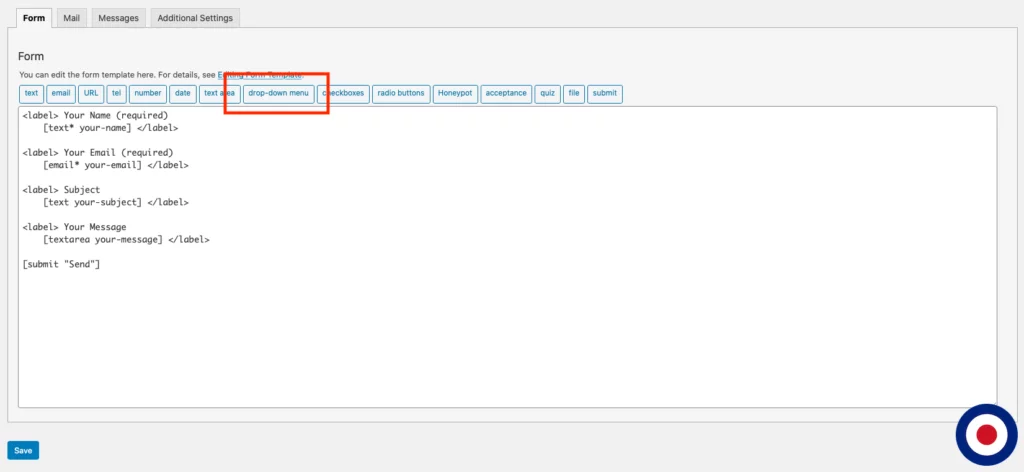
In the CF7 Form Tab select the drop-down menu button from the options.
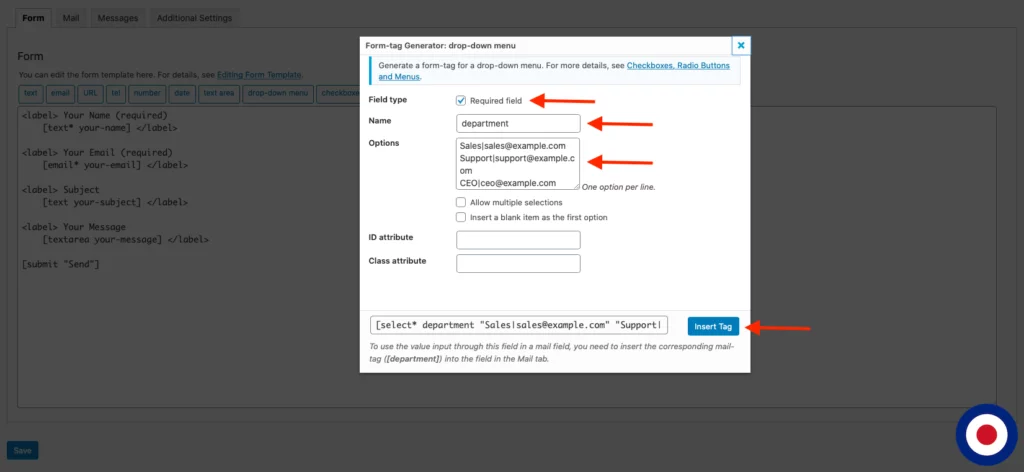
Once you have selected the drop-down menu options the Form-tag Generator screen will open. Select the Required Field if you want your clients to be forced to select a recipient. Make sure to give the dropdown menu a Name, for our example, we have used department. In the Options section, add the email addresses with the pipe character Sales|sales@example.com. If you want to add a blank item as the first option in the dropdown menu select the Insert a blank item as the first option checkbox.
Once you have entered all required information click the Insert Tag button. The dropdown menu will have been added to the Form Tab. However, you will notice that it has no label so we will need to manually add this. Just wrap the dropdown menu option in a tag, for example,
<label> Select Department (required)
[select* department "Sales|sales@example.com" "Support|support@example.com" "CEO|ceo@example.com"]</label>
Click the Save button add the bottom of the Form Tab.
Now move to the Mail Tab and add the [department] mail-tag to the mail recipient section To, then click the Save button.
That’s it. You have now successfully added a dropdown menu with selectable email addresses on your contact form, protect these email addresses from email harvesting using the pipe character and added the correct mail-tag to your contact form.

